
WebGL Application
FinalMesh generates complete, fully functional HTML pages. You may upload as it is, to your website and share 3d models with your friends, collegues or clients. You may also incorporate 3D features into your web site and add additional, custom functionality.
Code Generation
#1
Generate javascript files with Save As WebGL command. Make sure to select file format to "WebGL package", uncheck Minify Scripts and check Provide Extra API. Template - "Only Canvas Code".
- Template "Canvas Code" - this just helps to remove everything specific to particular template
- "WebGL package" - in this case, this option should provide support to load WebGL package and Binary Lossy formats.
- Minify Scripts - to be able to look into internal parts of our JS framework
- Provide Extra API. Without this option, FinalMesh will remove many parts of code not related to currently saved file and rest option. For instance, support of textures or shadows may be removed.
#2
Same as first method, but use "API Sample" template to generate all scripts, including clipping planes, world space axes, tree-view control.
HTML page
Copy produced JS files to any folder. For instance this may be "js" folder.
Include these files into your HTML page. You may copy script tag from produced HTML page to your page. For instance:
<script type="text/javascript" src="ivsys.js"></script>
<script type="text/javascript" src="ivmatrix3d.js"></script>
<script type="text/javascript" src="ivwindow3d.js"></script>
<script type="text/javascript" src="ivspace3d.js"></script>
<script type="text/javascript" src="ivmtl3d.js"></script>
<script type="text/javascript" src="ivmesh3d.js"></script>
<script type="text/javascript" src="ivnode3d.js"></script>
<script type="text/javascript" src="ivhittest.js"></script>
<script type="text/javascript" src="ivtextures.js"></script>
<script type="text/javascript" src="ivshadows.js"></script>
Create canvas tag in your HTML page. For instance:
<canvas id="ivwindow3d" style="border: none" width="640" height="480"></canvas>
id, width, height, border may be any. 3D window constructor will add touch-action:none style. This helps to manage touch events in the right way. You may create canvas tag on the fly. There are no restrictions.
Initialisation
Before displaying 3d content, you should create FinalMesh 3d window. Fortunatelly, this is quite simple.
var canvas=document.getElementById("ivwindow3d");
view3d=new iv.window({canvas:canvas,file:"file.iv3d",color:0x777777});
This code gets canvas element from HTML page, creates 3d window and loads 3d file. For more detailed information, please see this documentation. Same code can be found in generated HTML page. Code is invoked from onload event.
If the file is not present, an empty 3d window will be created. 3D file may be loaded later with .load function.
You may get notification, that a file was loaded, object was clicked, etc.
File Loading
It is possible to load new file, replace old with new one or merge component into existing 3d scene at any time. Use .load function in order to load file.
A huge advantage of such an approach that you may display any complex file with textures, shadows and effects in just few minutes. This works out of the box. Later yo may add new features one by one. These featurs may be: custom loading progress indicator, custom handling of mouse click events, render modes selection, etc.
Resizing
One of important steps is in resizing of 3d control in case if you want to make it dynamic. The canvas should be resized with .setViewSize function. For instance:
var view3d=new iv.window({canvas:canvas,file:"file.iv3d",color:0x888888});
...
window.onresize = function(){view3d.setViewSize(window.innerWidth,window.innerHeight);}
Additional customizations
Almost any custom features can be added. The most common are described here:
Associate custom event when the user click on a object in the 3D scene
You should pick a method how objects in scene should be identified ( or associated with database ). This may be done by object name or metadata. In this example, metadata will be used.
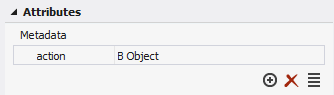
Script will read this metadata, and so something with it. In our example just display message box.
 view3d.addRefTarget(
  function(event)
  {
  switch(event.code)
   {
    case 'mousedown':
	{
	  var hit=event.hitInfo;// hit information may be available already
	  if(!hit)hit=view3d.hitTest(event.x,event.y);// if not, execute hit testing now
	  var node=hit.node;// node under nouse cursor - if found
	  while(node)
          {
            if(node.meta && node.meta.action)// search for supported metadata in node and parents
              {
                alert(node.meta.action); // show message box
                break;
              }
            node=node.parent;
          }
	}break;
   }
  }
);
Download .fmesh file used in this example.